Genius DIY Hacks That Take The Pain Out Of Painting
Everyone knows painting can be stressful — unless it involves a sip-and-paint night with Bob Ross. But instead of paying a fortune for supplies at Home Depot or an arm and a leg to hire a professional, a simple Pringles can or pool noodle may be all you need. Sound crazy? Well, thanks to these genius DIY hacks, no painting future project will ever be too big, too difficult, or too expensive!
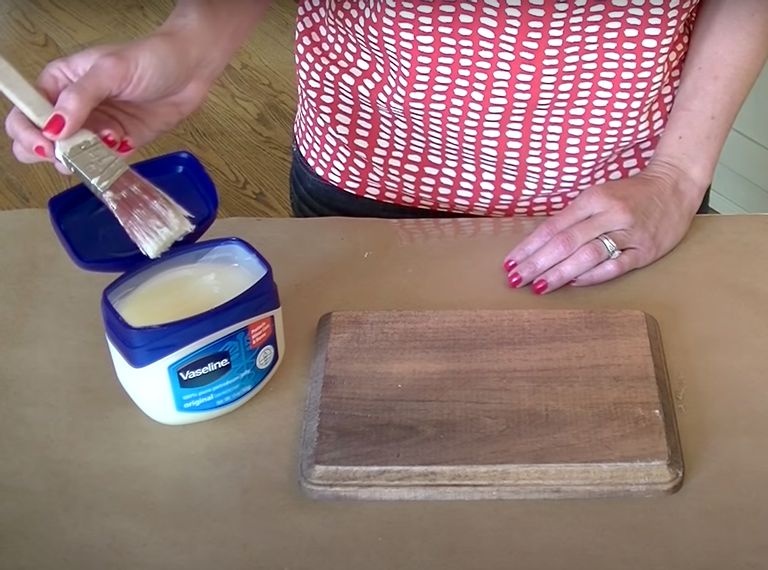
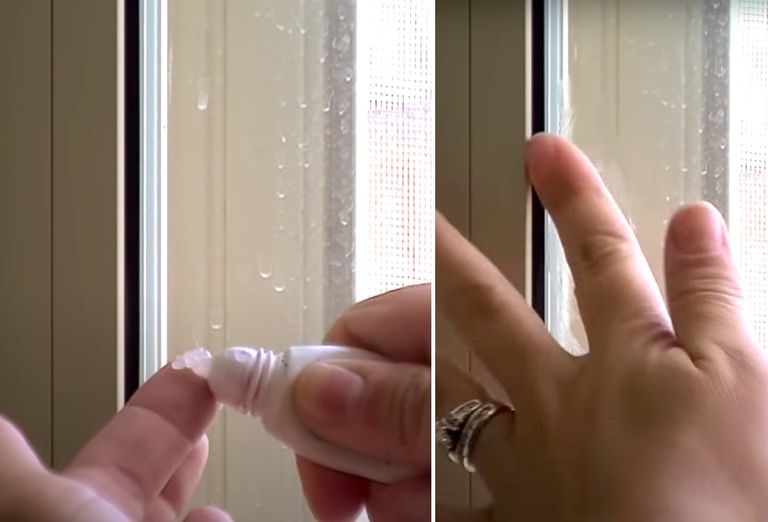
1. Vaseline protection
Vaseline is more than just an injury aid. If there are certain areas of a wall or object that you don’t want to be painted, simply smear a little petroleum jelly on them. The paint won’t stick to the oily surface, and the excess will wipe right off.
2. Fume fighter
To avoid those strong smells that erupt from paint cans, try adding one tablespoon of vanilla extract per pint. Not only will this neutralize that chemically odor, but the vanilla won’t compromise the quality of your paint. Plus, who wouldn’t want walls that smell like ice cream?
-768w.jpg?w=1024&q=75)
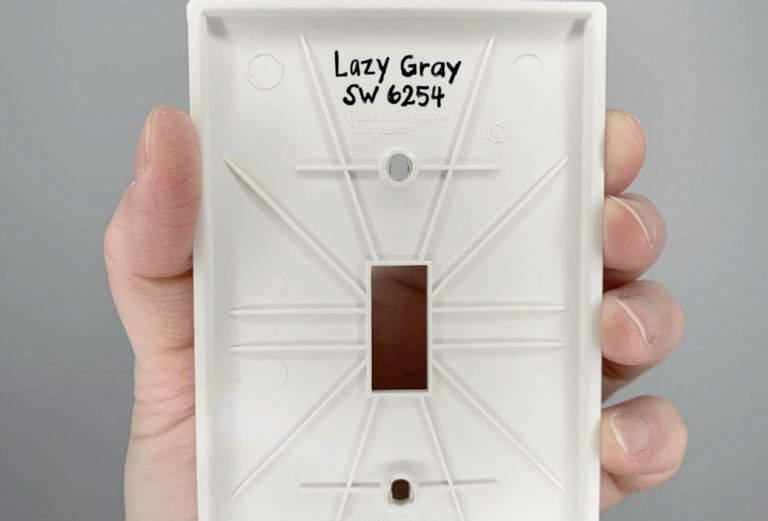
3. Hidden notes
Dead Salmon. Tornado Season. Mown Grass. There are so many different paint names. Remembering the one you used when you need to touch up can be a real pain...but it doesn’t have to be. For quick and easy reference, just stick a small note under a nearby fixture. You can even write it on a bit of tape!
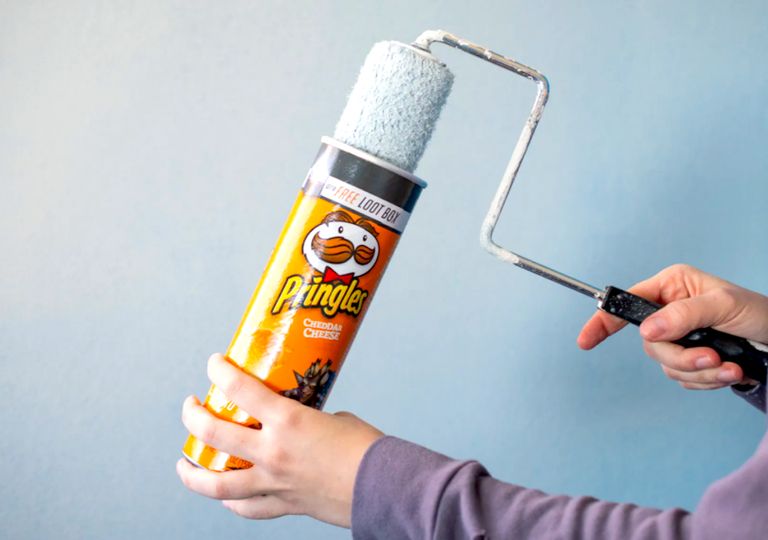
4. Roller holder
Tired of your paint roller always drying out? Try wrapping it in a plastic bag and sticking the whole thing inside a Pringles can. It’ll be airtight, easy to transport, and easy to find. Just don’t forget there are no chips in there.
5. Upcycled
A plastic jug can do more than just hold milk or water. By slicing off its front section, you can create a nifty little paint container that also doubles as a convenient brush holder. You’re welcome.

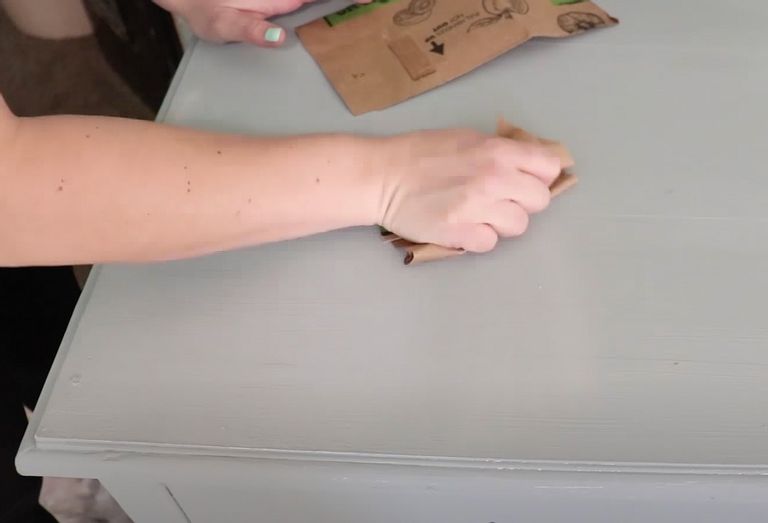
6. Buffing with a bag
Sandpaper can sometimes be too coarse for wet paint, so why not try a brown paper bag? If you’ve got any drips or rough patches, these lunch bags will provide the perfect way to smooth them out.
7. You’re the balm
If you’re out of Vaseline or petroleum jelly, lip balm works just as well to keep paint off surfaces. Simply spread, paint, and wipe clean. Just make sure you don’t put the residue on your lips afterward!
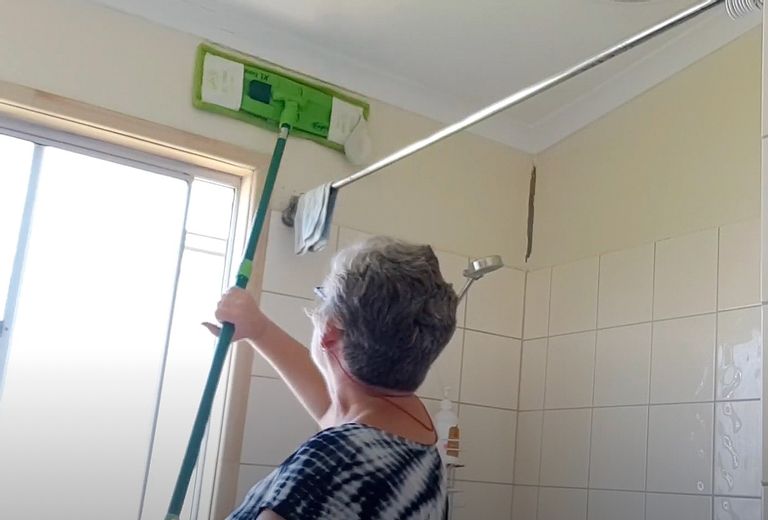
8. Wall cleaner
Before paint touches your walls or ceilings, you should make sure that they’re clean first. For high or any other hard-to-reach surfaces, a Swiffer can get the job done. Simply dampen the mop end and wipe those dirty areas clean.
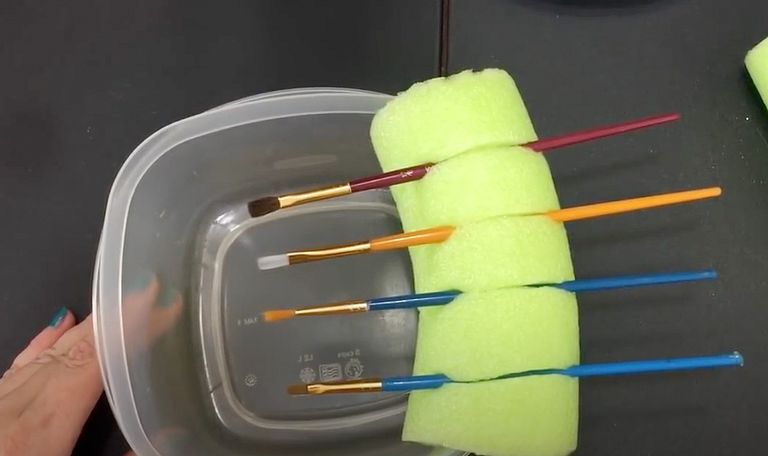
9. Use your noodle
If you find that your brushes keep sliding into the paint tray, pool noodles can help lower your blood pressure. Just cut a piece off of the noodle, secure it along the tray’s edge, and make the desired indents for your brushes to slip into.
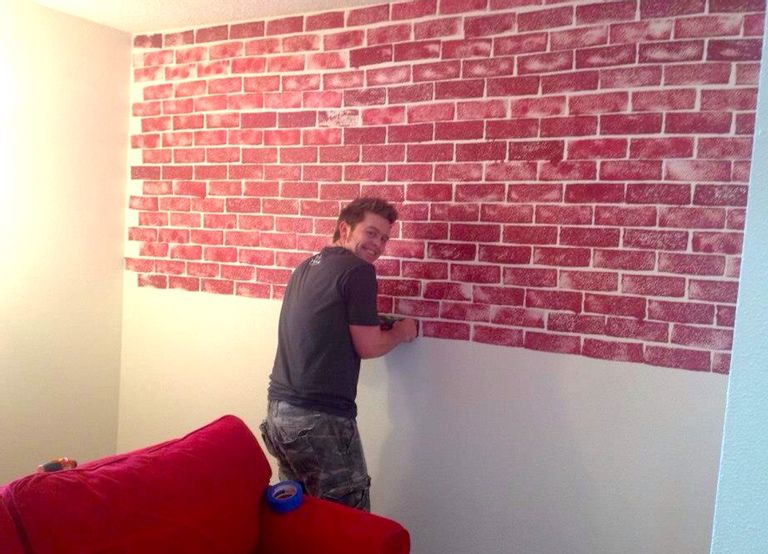
10. Brick (sponge) house
A brick wall can cozy up any room, but if you’ve got neither the time nor the energy for a full-on renovation, you’re in luck. Just coat a rectangular sponge in red paint and stamp your wall. You’ll have that rustic brick look on a budget.
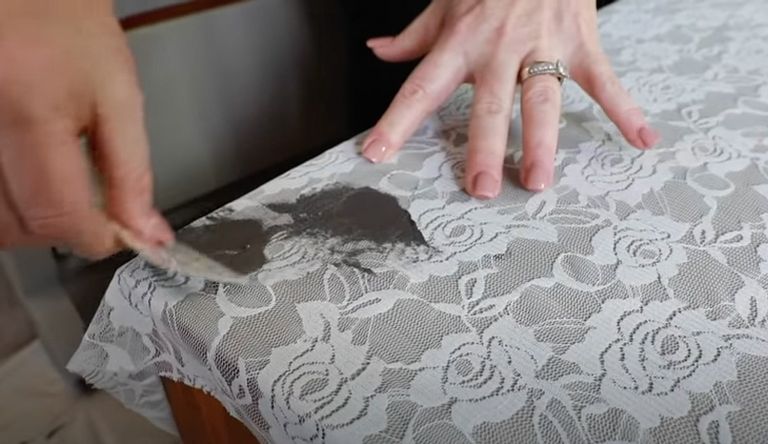
11. Lace creations
Sometimes, it’s a lot easier to borrow an existing design than to come up with one on your own. Lace, for example, makes a great template for walls and furniture. For an easy yet elegant look, simply find a swatch with a design you like, put it up against your wall, and spray. Voila!
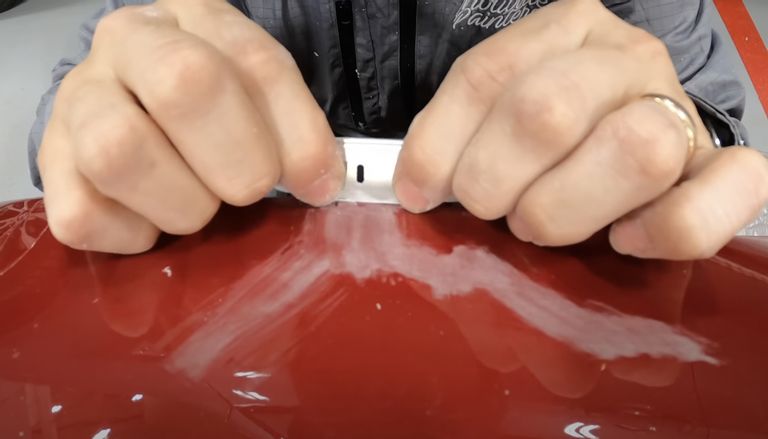
12. Paint scraper
There’s no worse feeling than spotting those dreaded paint lines or drips after you’ve just finished a day of painting. If sanding off the areas doesn’t work, try carefully scraping those pesky marks with a razor blade.
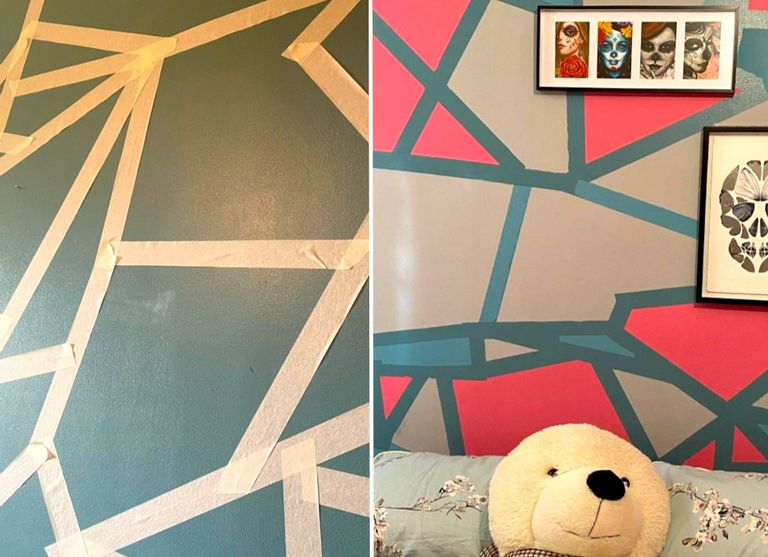
13. Tape design
Painter’s tape can be used for more than just keeping color off of your molding. If you’re sick of monotone walls, use a few strips to create funky, bleed-free designs that’ll liven up any living space or bedroom.
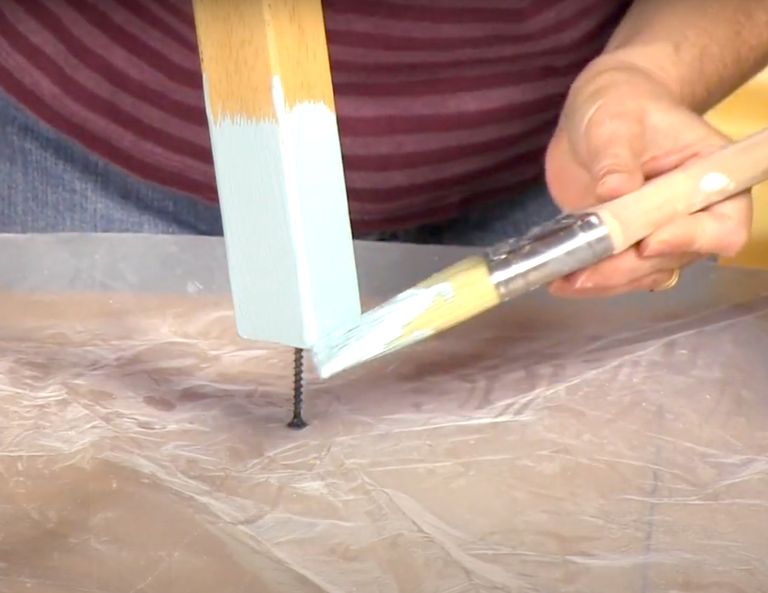
14. Care for your chairs
Even chair legs need a touch-up every once and a while, though getting underneath them can be tricky. Instead of tipping or flipping the chair and risking cracks or scrapes, use screws to hold up each leg and paint away.
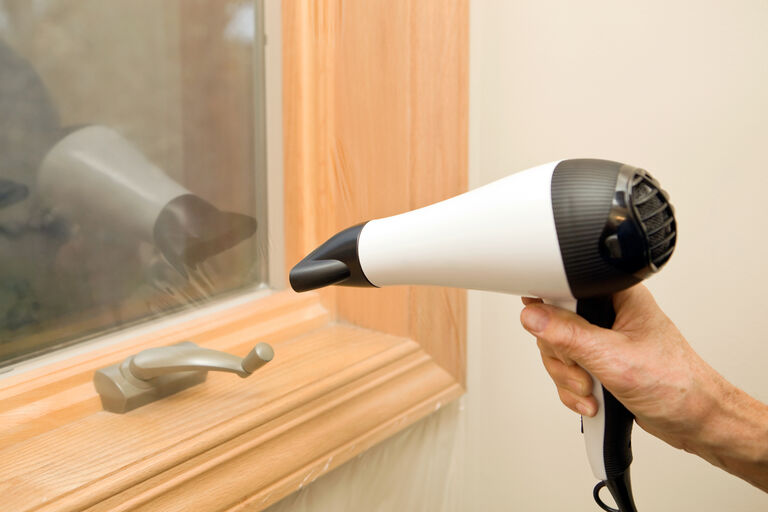
15. Dryer hack
While masking tape helps you achieve a nice, neat paint job, it can be a pain in the butt to remove. But we’ll let you into a secret. Just power up a hairdryer and wave it over the section of tape you want to rip off. This should prevent you from creating any unnecessary and annoying chips in your walls or baseboards.
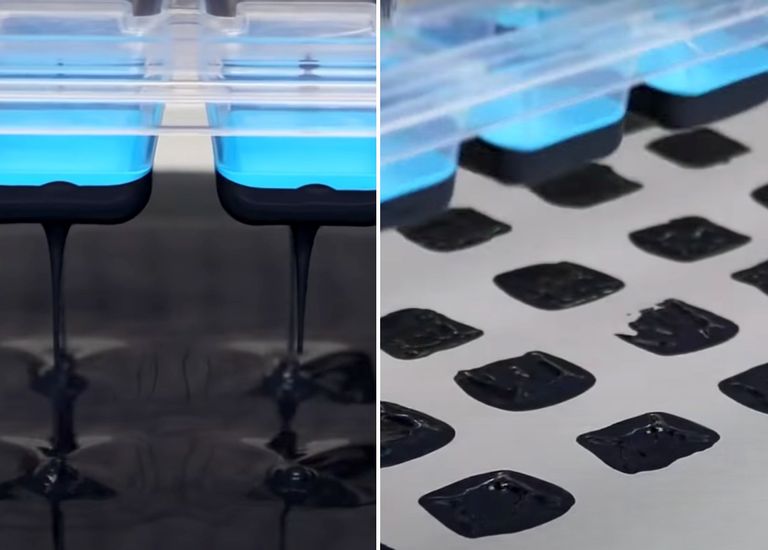
16. Ice-cube art
What better way to feel like an artist than by decorating your wall by hand? For a unique DIY design, try dipping an ice cube tray in paint and using it as a makeshift stamp. Your walls are guaranteed to be the talk of the town!
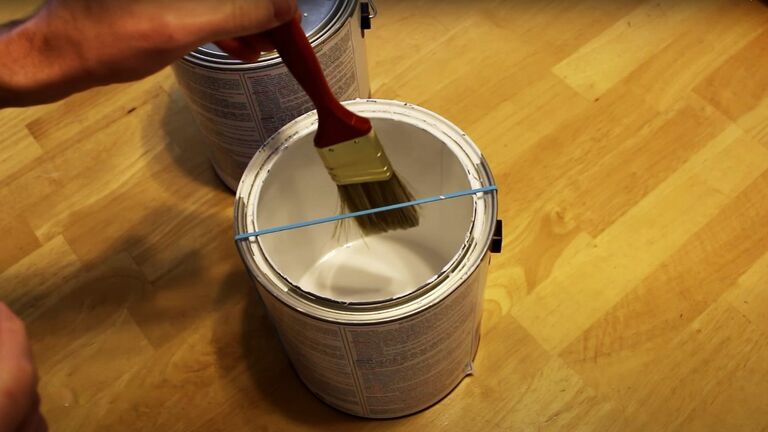
17. The Rubber Band Trick
This rubber band trick is perhaps the most useful painting hack of them all. It has the potential to save you from making rather a lot of mess, you see — both on the floor and around the lid of the paint tin. All you have to do is stretch a rubber band around the container. That way, you can use it to wipe the excess paint off your brush before slapping it on the walls.
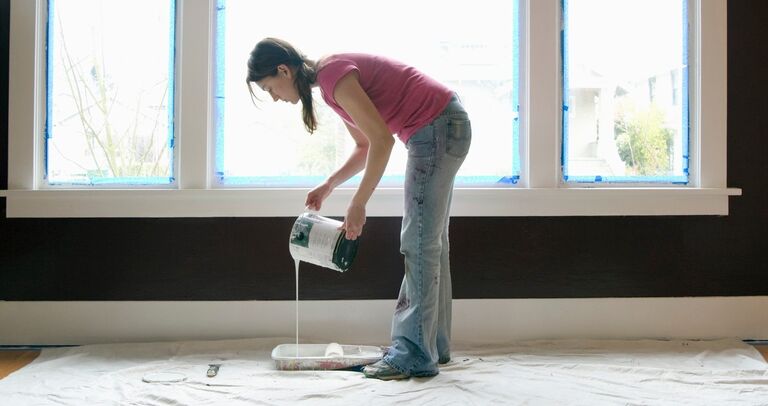
18. Drop cloth aid
No experienced painter would be caught dead without a drop cloth, but aren’t they such a pain to fold up when you’re done? Instead of struggling to gather up the flimsy fabric, tape some cardboard to the corners to give the cloth some shape. Folding will now be a breeze!
-768w.jpg?w=1024&q=75)
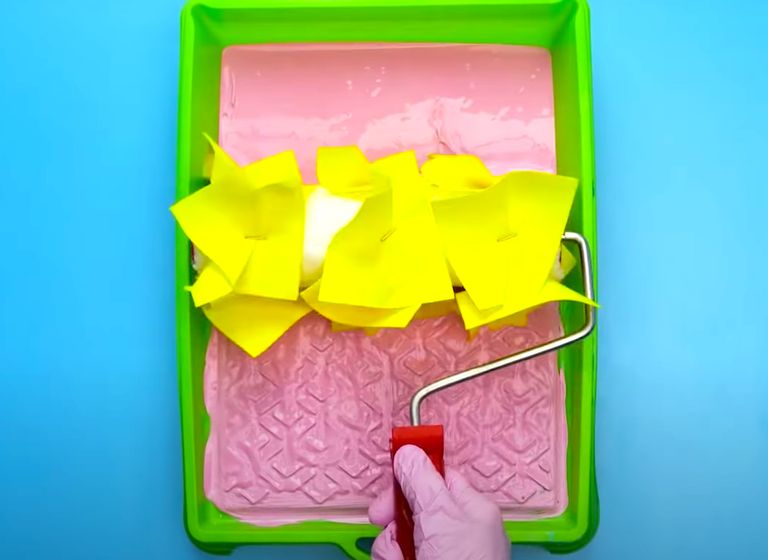
19. Roller magic
Bored of your paint roller’s ordinary design? Simply staple some sticky notes to the sponge, roll the whole thing through paint, and apply to your wall. The result: a unique design that you won’t be able to take your eyes off of.
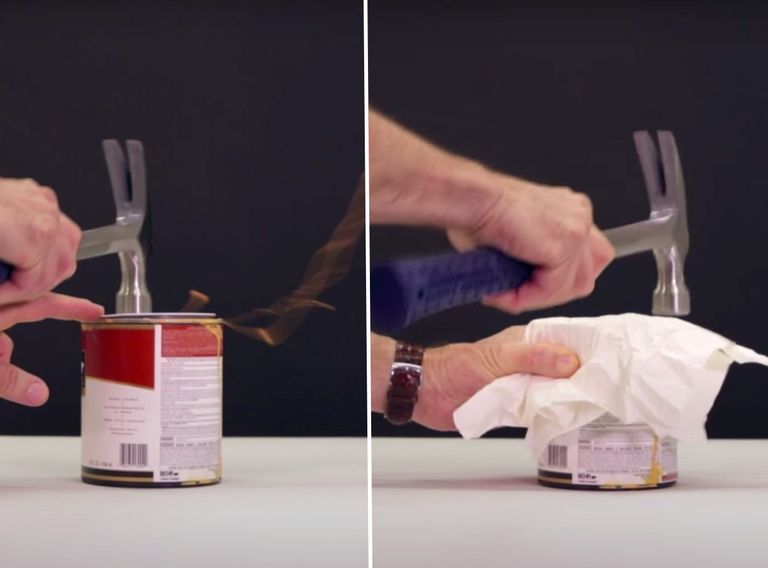
20. Cover shield
We’ve all been there: you go to hammer shut a paint can, and its contents splatter everywhere! Instead of taking a chance in the splash zone, keep a towel or cloth handy and cover the lid as you close it. Crisis averted.
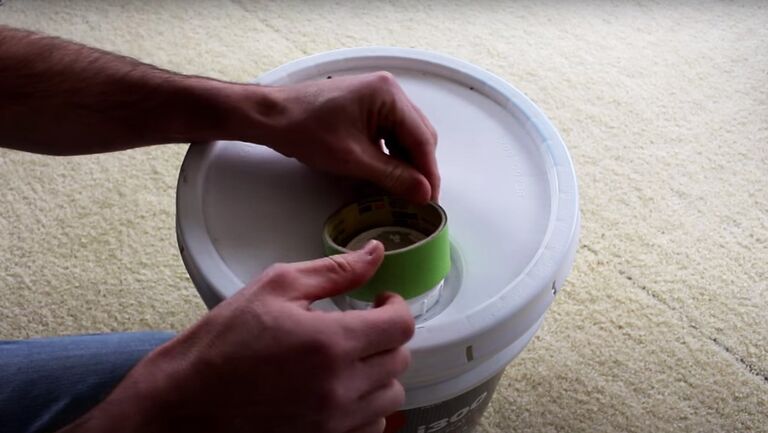
21. Removing the paint lid
Struggling to open that pesky paint bucket? Well, fret no more. In a video shared by the Specific Love Creations YouTube channel, the host shared a simple solution. He said, “If you take a nice roll of tape, carefully wedge it on top [of the screw lid], squeeze really hard and give it a turn, there you go.” Job done.
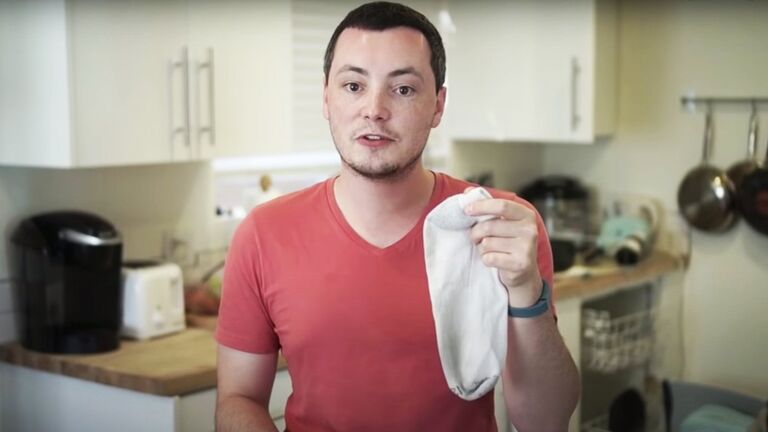
22. Making your arm a tape dispenser
Masking tape is a must when you’re painting at home. And to avoid constantly forgetting where you last put it down, why not turn your arm into a makeshift dispenser? All you need to do is trim an unneeded sock and pull it over your forearm. Then stick your hand through the roll and tear bits off when required. Why not become a real pro and fold over the end of the tape while you’re at it, too?
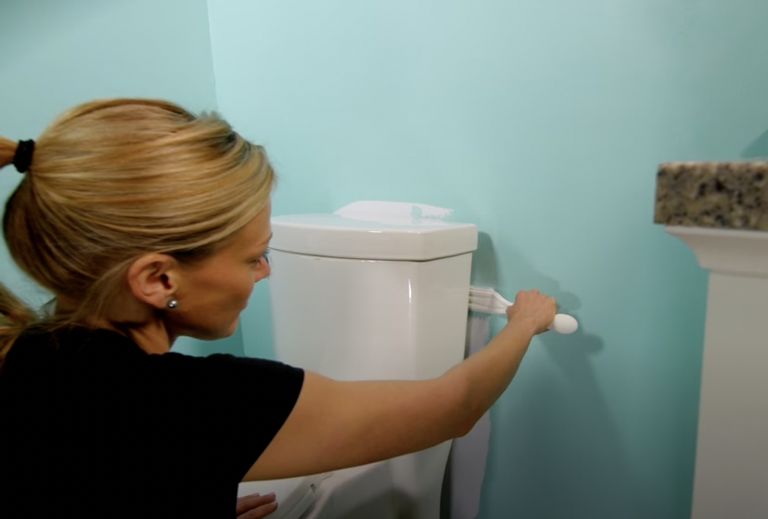
23. Painting hard-to-reach spaces
When you’re painting, space is everything. The more room you have to work with, the easier the job should be. But that’s a luxury you don’t have with more compact areas — like, say, behind a toilet. So, to help get in every hard-to-reach place, just attach a paint pad to a handle. Now no gap will seem too small.
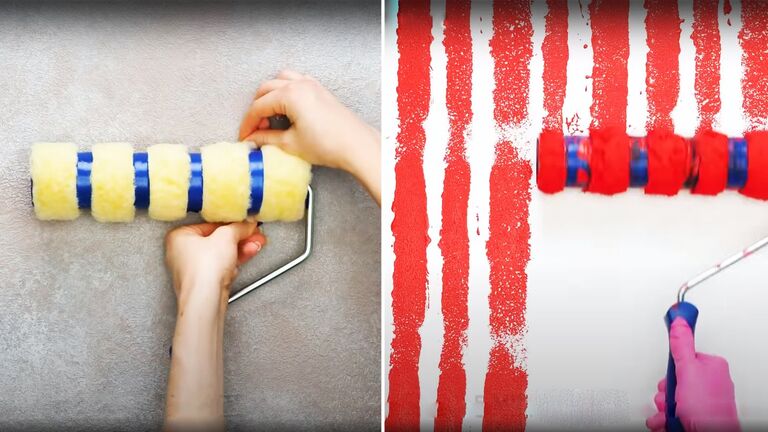
24. Striped wall pattern
Fancy adding a timeless stripe pattern to your walls without the ordeal of hanging wallpaper? If so, we’ve got you covered. Simply wrap four pieces of equally spaced insulating tape around your roller. This will become the template for your design. Now all you need to do is dip the tool into the paint and apply. Look at how your walls come to life!
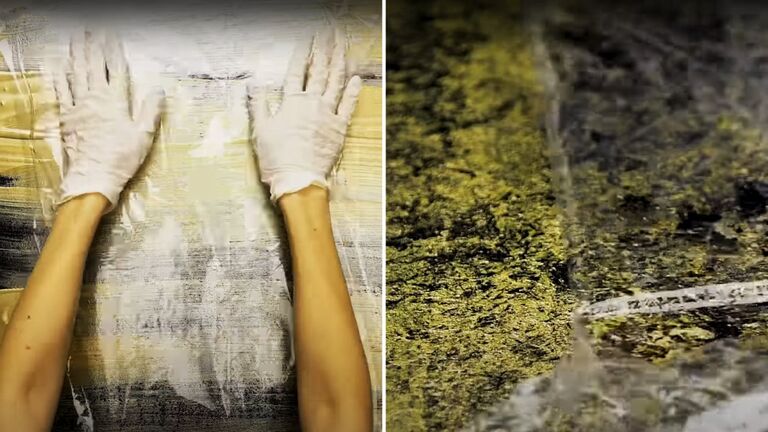
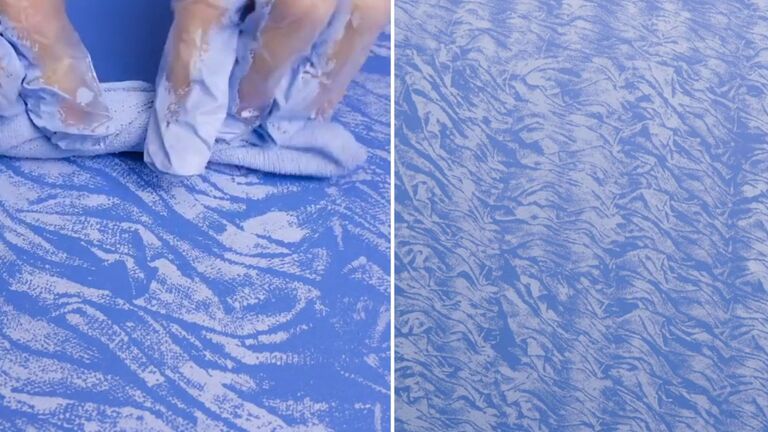
25. Use cling film for a chic look
Looking to make a bold change to your decor? This design idea could be right up your street. First, just apply a coat of dark paint to the chosen wall and let it dry. From there, add a lighter color with your brush — just one or two strokes should do the trick. Then stick some cling film on top and apply pressure all over. Peel that layer off to reveal the eye-catching result.
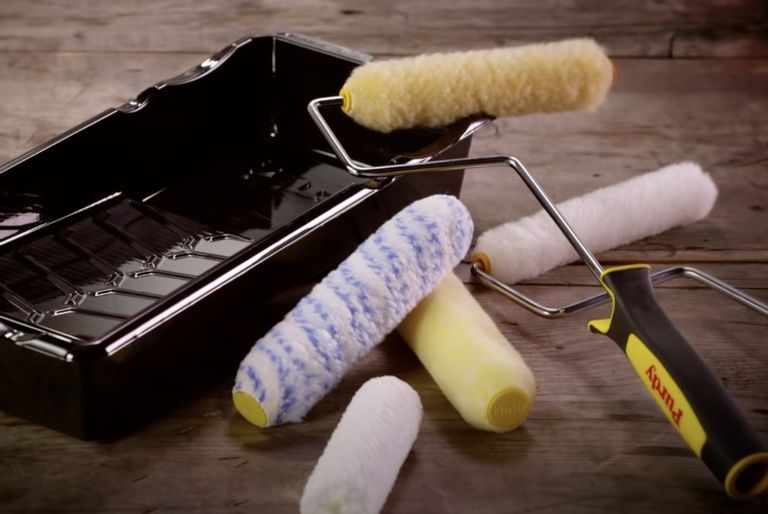
26. Use smaller rollers
There’s no denying that large rollers make painting walls easier. They’re not so good, though, when you’re trying to coat corners. But to save having to reach for a brush and avoid any obvious changes in your wall’s finish, grab a smaller roller. The soft material is often wrapped around the end, you see, meaning you can tuck right in tight to the corners.
27. The rag trick
Deciding on a new way to spruce up a wall can be a bit of a headache — especially if you don’t want to spend ages sifting through endless wallpaper samples. All you need is an old rag and some paint. Twist the cloth into a sausage shape before dipping the material into your paint tray. Now, roll it down your chosen area for an expensive-looking design all your visitors will notice.
28. Keeping your brushes in good condition
As if cleaning brushes isn’t dreary enough, there’s a possibility your current method could actually be damaging your tools. Yep, the YouTuber behind the Specific Love Creations channel says, “If you just put [your brush] in a jar, there’s a good chance it will deform the bottom... especially if you have real soft bristles.” To solve this problem, simply attach a binder clip to the brush handle. Your tool should now dangle in the cleaning solution without pressing against the base of the container.

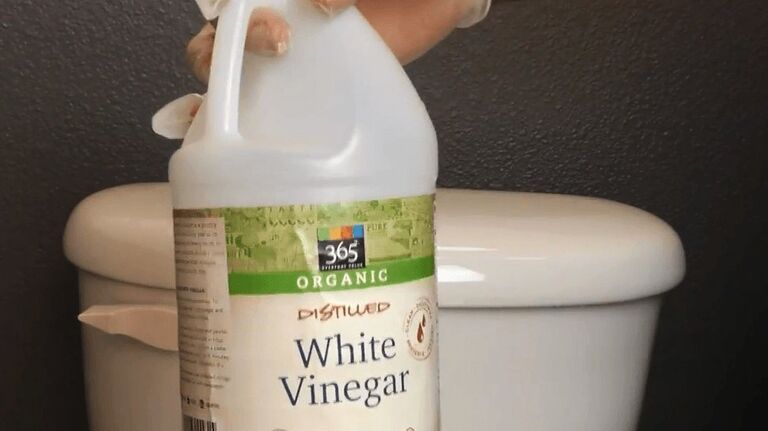
29. Painting concrete
Do you know the best way to prep the surface you want to paint? Take concrete, for instance, which may not react too well to a fresh coat without at least a little groundwork. But don’t worry. Covering the area you wish to freshen up in white vinegar will help prevent the paint from splitting. Is there anything vinegar can’t do?
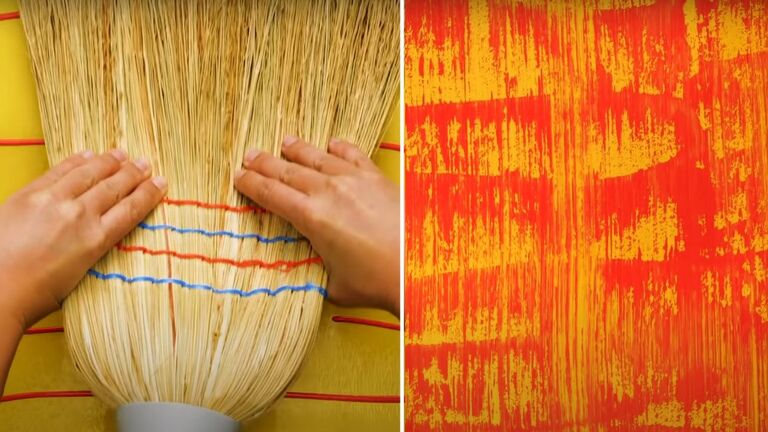
30. Use a straw broom
This simple design idea will help bring any room to life — and it’s fairly quick and simple to boot. Use your roller to coat your chosen area in a base color. Then squirt a different yet complementary shade in wavy lines across the surface. And once you’re done with that step, grab a broom and wipe the wall down. Your guests will be green with envy — even if that’s not your color of choice!
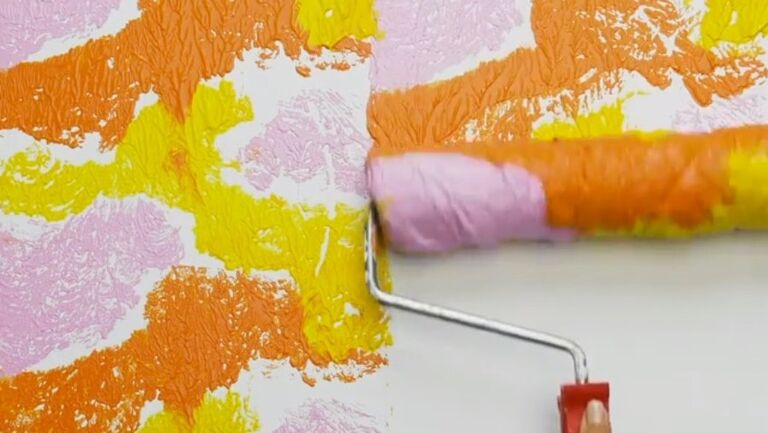
31. Multicolored pattern
Painting a wall with one color is hard enough, but three at the same time? It can’t be done... right? Well, with some creative thinking, it’s possible. All you need is a roller, a plastic bag, and an elastic band. Wrap your tool in the bag before securing with the band. Then pour your chosen shades next to one another in your tray, and you’ll be able to produce a very cool patterned effect.
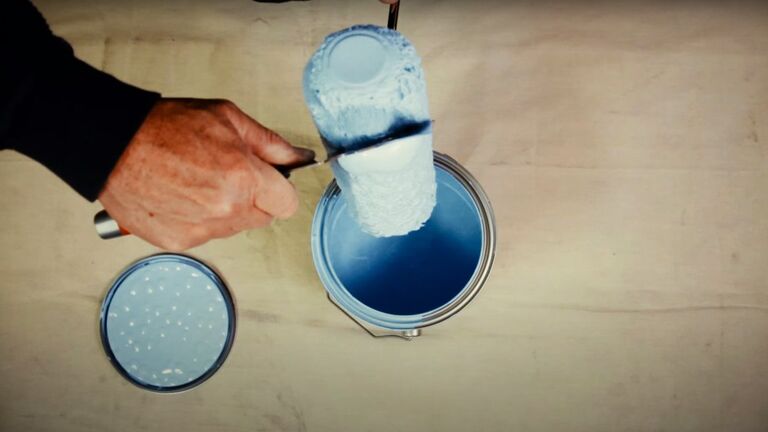
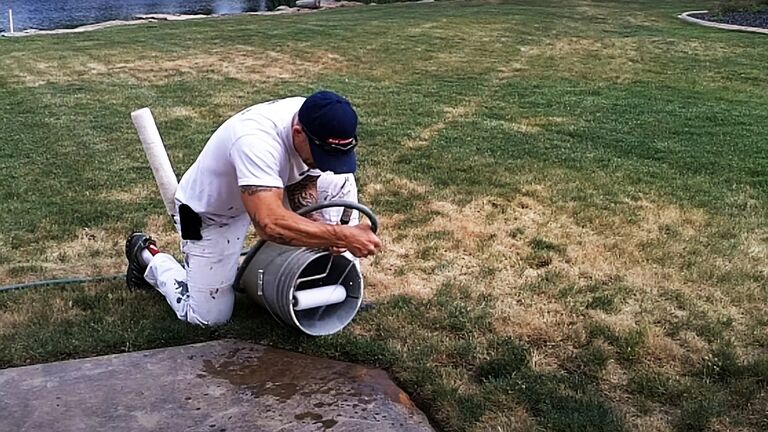
32. Saving paint
After you’ve finished using your roller for the day, washing it under the tap seems like a no-brainer. Before you do that, though, we’ve got a tip that will save both money and the planet. Yes, running a putty knife over the tool will allow you to scrape any excess paint back into its container. You never know when you’ll need the extra drops! Plus, it means fewer chemicals make it down the drain. It’s a win-win!
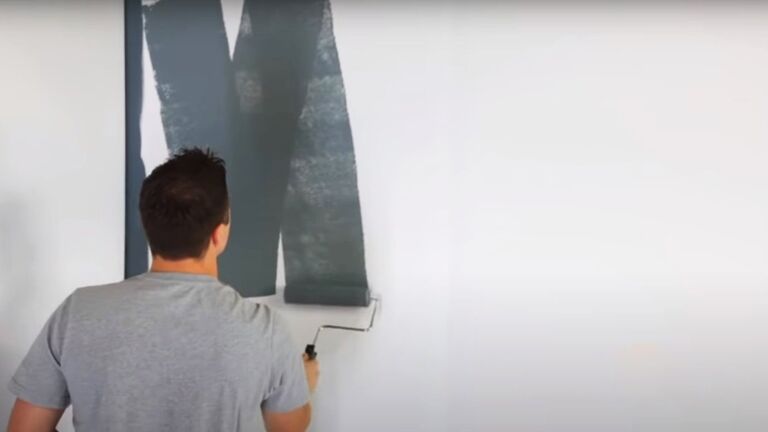
33. The "w" pattern
Use rollers when painting? Then we’ve got a question for you. Have you ever heard of the W pattern? No? Well, it may be an idea to jot this down. Basically, rolling the paint in the shape of that letter should ensure it’s applied more evenly. This technique may even save you from that tiresome third coat, which has to be a bonus.
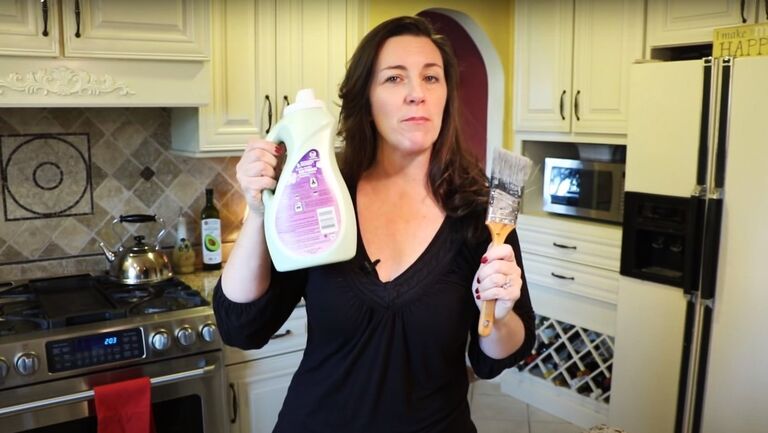
34. Fabric softener to the rescue
Those brushes won’t clean themselves, but the chemicals you need? Stinky enough to give you a migraine! So to make this chore less unpleasant, try using a fabric softener instead. Soaking your tools for a few hours in a solution of the stuff should help to soften the bristles, allowing for a nice smooth paint job.
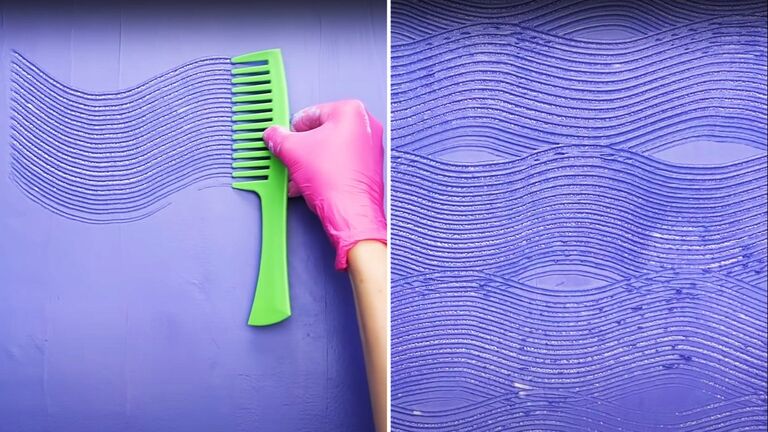
35. Creating waves
If you want a cool pattern on your wall in only one color, look no further. Aside from the usual paint and roller, you’ll just need to get your hands on a spare hair comb. Then, after coating the surface in paint, grab the detangler and push the tooth end into the wall that’s drying. And all you have to do after that is to simply drag the teeth along in a swirling motion until you’re satisfied. See the waves? Cool, eh?
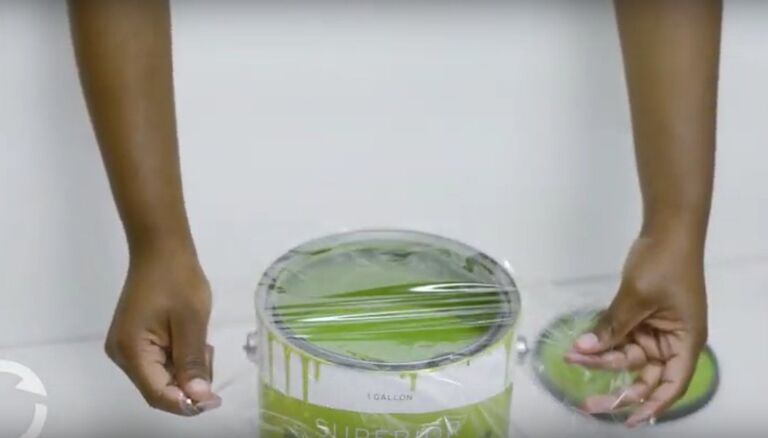
36. The plastic wrap hack
To explain this next hack, we’re deferring to professional contractor Joe Truini. In a piece for the Today’s Homeowner website, he advised, “You want to try and store your [paint can] safely and seal out as much air as possible. All you need is some food wrap. You want to lay it right in the can and set it on top of the paint.” This prevents the contents from hardening, so your paint should be good as new when you come to dig it out again.
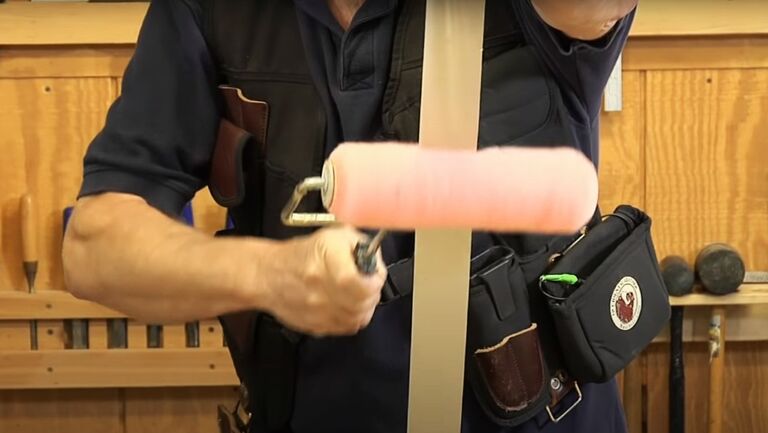
37. Prepping your rollers
Before you even think about painting over the walls in your house, there’s an important step you need to take. What’s that? Well, you’ve got to prepare your rollers, of course! Apparently, running the tools under heated water will help them soak up the paint. And doing this may well improve the quality of your finished look.
38. Eliminate roller fuzz
Ah, fuzz — the bane of any homeowner’s existence. The stuff can get everywhere if you’re not too careful, and rollers aren’t immune to collecting it, either. But whatever you do, don’t start painting with one that’s been fuzzed up. Instead, get hold of a roll of packaging tape and run the tool across a sticky strip or two. That should clean the fluff right off.
39. Vinegar soak
An abrasive liquid like vinegar seems like the last thing you’d want to get near paint — and you’re right. Soaking your tools in vinegar after finishing a project will make it much easier to get rid of all that caked-on paint. Less mess, less stress!
-768w.jpg?w=1024&q=75)
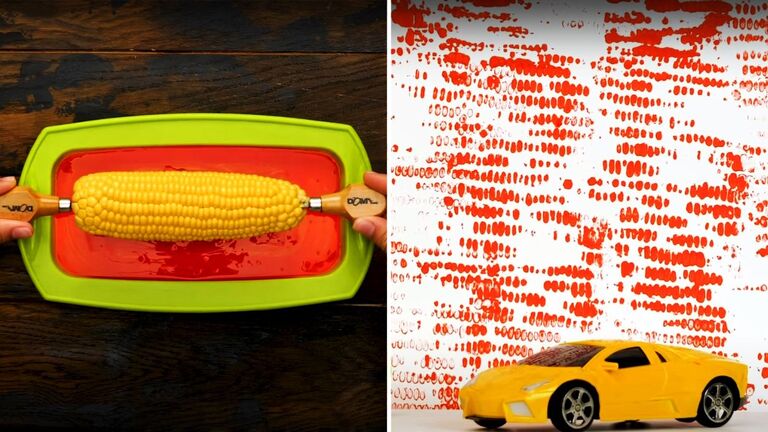
40. Corn roller
Corn on the cob is pretty much a lumpy roller, right? And that makes it an ideal stand-in for your usual painting tool. Just pierce the ends of the corn with a couple of screwdrivers before coating it in paint. That way, you can create a fabulously unique pattern on your wall. Go on! Stand out from the crowd!
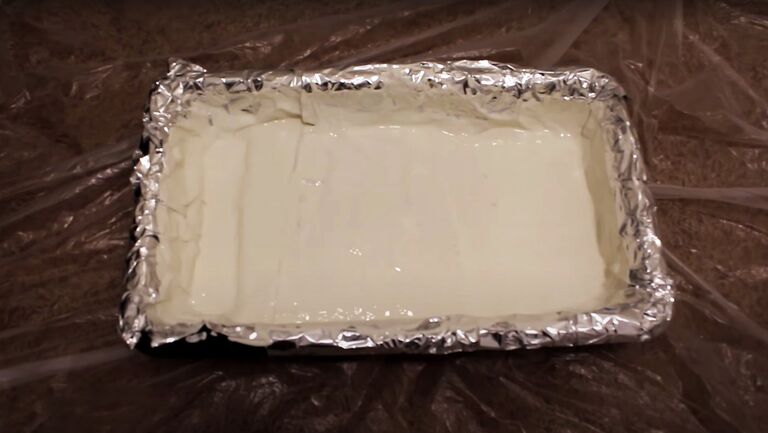
41. The paint tray hack
As you’ll no doubt know, paint trays can become extremely messy after a while. But there’s a simple way to avoid that problem. Just wrap the receptacle in kitchen foil or a plastic bag. The layer of protection stops paint from staining the surface of the tray, which also makes cleaning it a lot easier.